 |
| Sitemap page using css and HTML. |
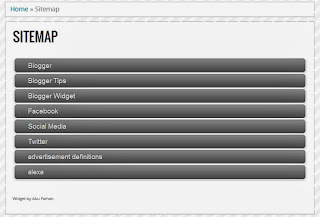
Sitemap for a website or blog generally describes the structure of a website. Sitemap page is like a table of content which helps the website users to easily navigate through the website. We often see sitemap links on various website, there are different layouts for sitemap page but the motive is same to help users to easily navigate.
Live Demo
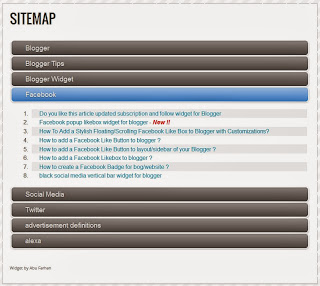
You can generate a sitemap page on your own but it takes some time, so if you don't want to give time for creating and updating sitemap then this widget is perfect for you. This sitemap/table of content generator widget fetches all your tags or labels and shows it in a structured manner. This widget shows all your posts with an expand feature that is it shows tags and when you click on a tag then it shows all the post with in that tag.
 |
| Sitemap widget expand feature. |
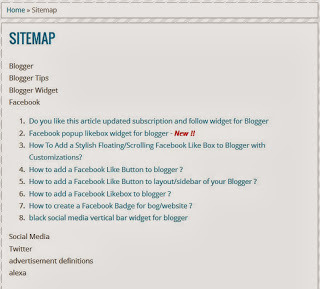
Here i am providing this widget with CSS code that makes this widget more attractive but if you don't want to use css code then don't use it, even without css code it works perfectly.
 |
| Sitemap without css. |
How to add this widget to Blogger ?
Step 1:
This is a two step process :
- Log in to your Blogger Account.
- Then go to Dashboard >> Template >> Edit HTML.
- Now search for following code:
]]></b:skin>
- Now paste the below code just above ]]></b:skin> code.
/*---- css code for sitemap strat ----*/
.judul-label{
background-color:#E5ECF9;
font-weight:bold;
line-height:1.4em;
margin-bottom:5px;
overflow:hidden;
white-space:nowrap;
vertical-align: baseline;
margin: 0 2px;
outline: none;
cursor: pointer;
text-decoration: none;
font: 14px/100% Arial, Helvetica, sans-serif;
padding: .5em 2em .55em;
text-shadow: 0 1px 1px rgba(0,0,0,.3);
-webkit-border-radius: .5em;
-moz-border-radius: .5em;
border-radius: .5em;
-webkit-box-shadow: 0 1px 2px rgba(0,0,0,.2);
-moz-box-shadow: 1px 1px 4px #AAAAAA;
box-shadow: 0 1px 2px rgba(0,0,0,.2);
color: #e9e9e9;
border: 2px solid white !important;
background: #6e6e6e;
background: -webkit-gradient(linear, left top, left bottom, from(#888), to(#575757));
background: -moz-linear-gradient(top, #888, #575757);
filter: progid:DXImageTransform.Microsoft.gradient(startColorstr='#888888', endColorstr='#575757');
}
.data-list{
line-height:1.5em;
margin-left:5px;
margin-right:5px;
padding-left:15px;
padding-right:5px;
white-space:nowrap;
text-align:left;
font-family:"Arial",sans-serif;
font-size:12px;
}
.list-ganjil{
background-color:#F6F6F6;
}
.headactive{
color: #fef4e9;
border: 2px solid white !important;
background: #1C8DFF;
background: -webkit-gradient(linear, left top, left bottom, from(#9dc2e7), to(#438cd2));
background: -moz-linear-gradient(top, #9dc2e7, #438cd2);
filter: progid:DXImageTransform.Microsoft.gradient(startColorstr='#9dc2e7', endColorstr='#438cd2');
}
/*---- css code for sitemap end----*/
Note: Step 1 is optional, if you don't want to style your sitemap page then skip step 1.
Step 2:
- Now again go to Dashboard >> Pages.
- Then click on New Page and select Blank Page.
- Now in HTML section of your page copy and paste the below code in it.
<!-- sitemap code starts -->
<script src="http://nurulimaminfo.googlecode.com/files/daftarisiv2-pack.js">
</script>
<script src="http://www.bloggenes.com/feeds/posts/summary?max-results=1000&alt=json-in-script&callback=loadtoc">
</script>
<script type="text/javascript">
var accToc=true;
</script>
<script src="http://deroc.googlecode.com/files/accordion-pack.js" type="text/javascript">
</script>
<!-- sitemap code ends -->
- Now Save your page and click on Preview or Publish button to see the sitemap of your blog.
Customizations:
- Replace my blog URL shown in red with your blog's URL.


Is there any single code instead of double code? I found a nice code that is supposed to placed just in a new page as HTML. But it's no longer working.
ReplyDelete